Inverter setup - mounting with 2-0 gauge cable
|
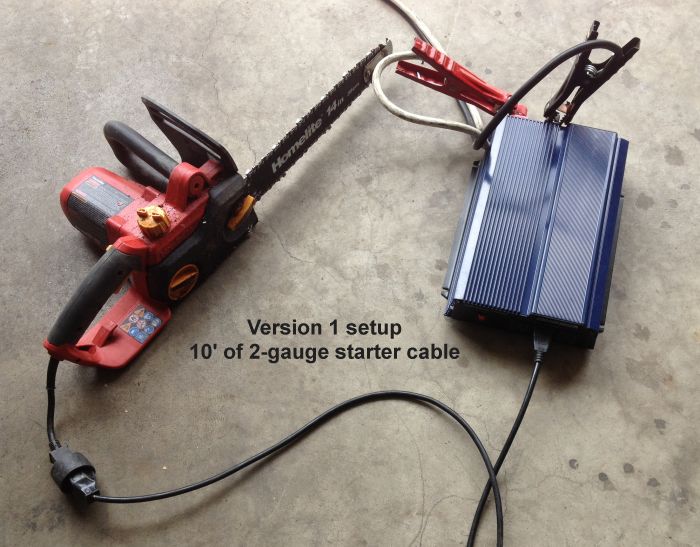
Components Inverter: Chicago Electric 1500/3000 watt Power cable: Version 1 - 10' 2-gauge jumper cables Power cable: Version 2 - 3' 2-0 inverter power cables Saw: Homelite 14", 120vAC, 9amp A nice enhancement for the jeep - a mountable power inverter with satisfactory power cables. The first photo is of the original setup. All parts were portable and would find their home (when use was expected and I didn't have any passenger) on the front passenger floorboard. Ease of configuration was its plus. It had one downfall that I knew of - opening the hood at each use spot to connect the jumper cables / and disconnect and close the hood before moving on. The open/connect/disconnect/close for the hood was getting long in the tooth. I decided to mount the inverter in a semi-permanent location. As the jeep sits outside I did not wish to have it mounted in the jeep and then to have it stolen - it would come out at the end of the day / before sitting unattended outside. Where to mount if was the question. In the end I chose to mount it outside. With an outside mount, I'd have to watch for water - rain or puddle splash - but I don't think that'll be significant. It can run cooler outside. I'll also be able to mount it close to the battery. I did not give any consideration to power drop when I used the jumper cables but after research I came to see the cables as a limiting factor. In use, the chainsaw would give a reasonable cut rate though I could not PUSH the cut / increase the load without overloading the inverter. It was such that I was looking to modify the inverter to have an auto-reset sequence for it (and save me walking away from the cut site to the inverter to power cycle it). With properly sized and short (three foot long) power cables the first test of the new setup only found me power cycling a couple times (old setup would have been 10+ times) and both I knew I was pushing the saw - well more than what I could have with the jumper cable setup. This is a nice improvement such that the auto-reset circuit might not get installed nor do I think I'll look to purchase a larger inverter. |
| Version 1 / original configuration.
Un-mounted, portable, using jumper cables. |
| Let's get to work! |
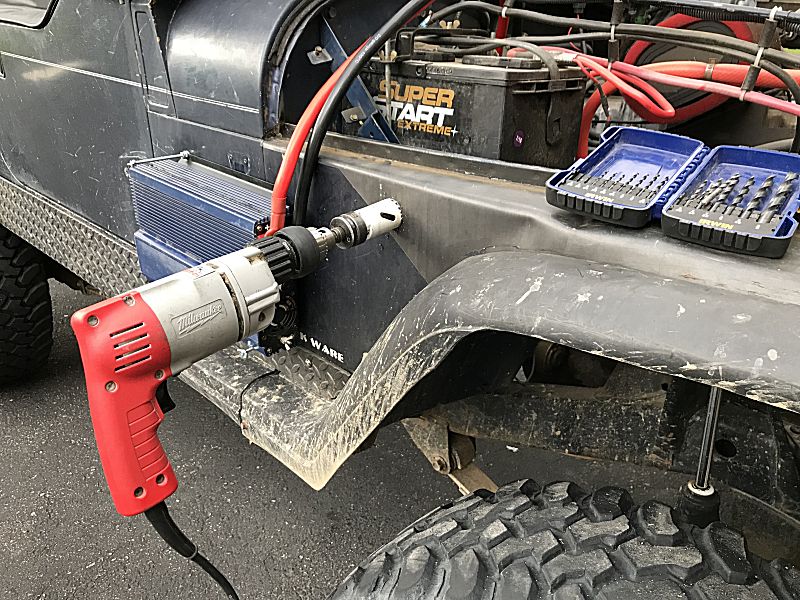
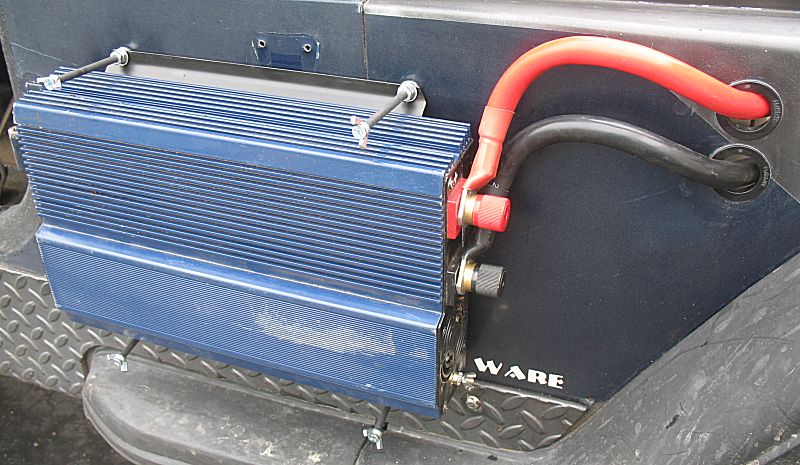
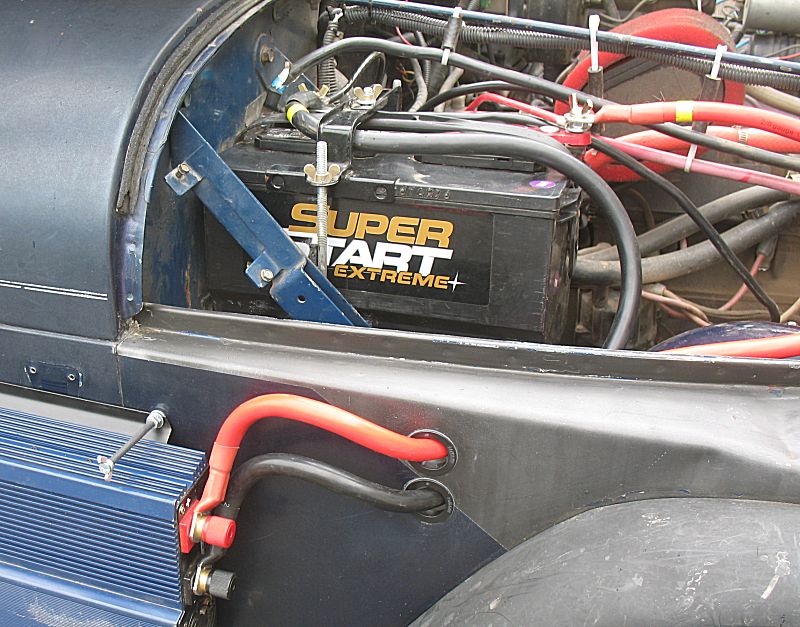
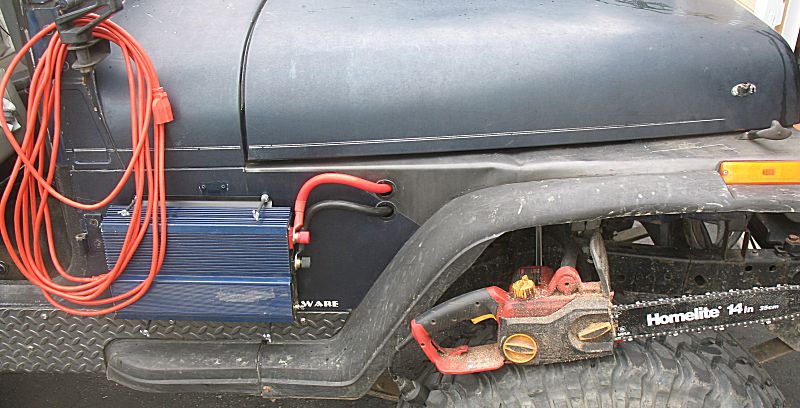
| Version
2 setup - mounting on the side of the jeep, close to the battery. I
considered atop the hood, but then I do put the windshield down and
it'd get in the way. On the side, with a couple holes for the power
cables, the hood can stay down once the cables are connected to the
battery (bonus!). I used jack nuts, with a bit of 2-part epoxy below the mounting flange to help keep them from turning. |
| I
did end up converting the battery cables from the
cable-molded-into-connector style to a bolt-on style. This would give
me the ability to securely connect the inverter cables / no spring
clamps needed. |
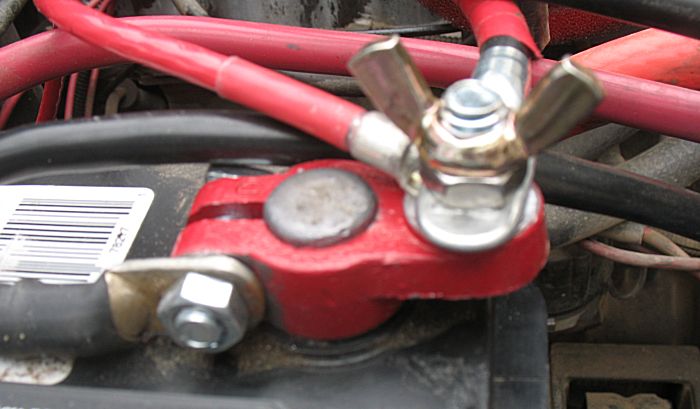
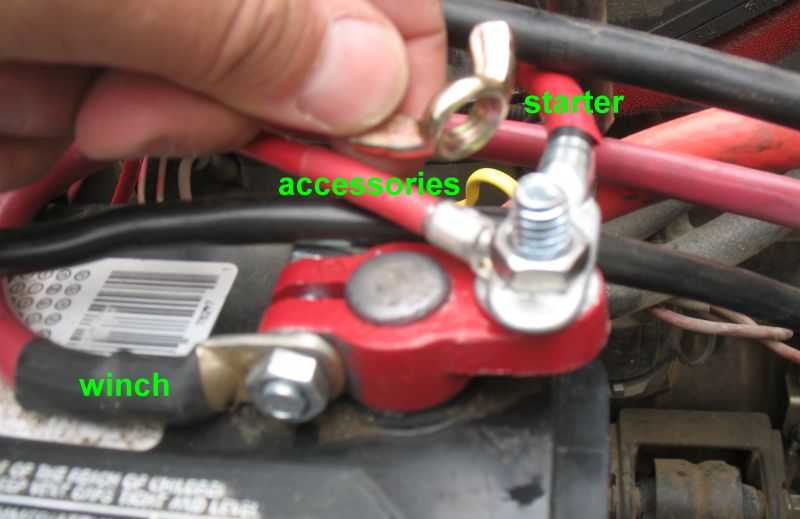
| Finger
tight wing nut to connect the inverter cable. The other vehicle cables
stay secure below a jam nut. The winch stayed connected as it was in
the past. |
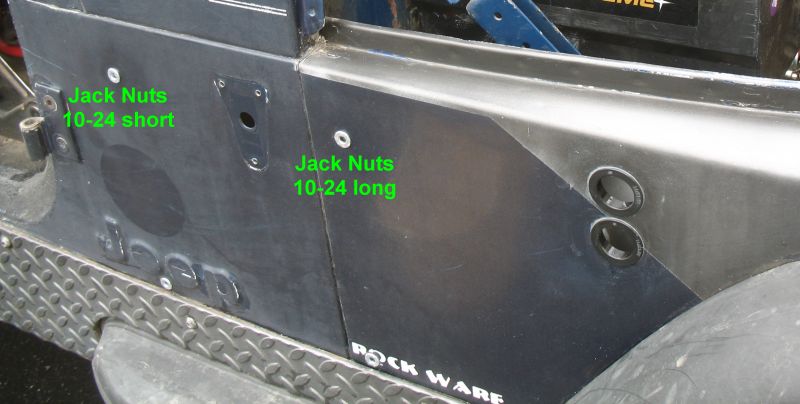
| I
considered placing cable route holes directly behind the connection
posts but decided if I chose to change inverters the holes might not
line up so I put generic holes forward to allow for inverter expansion
/ upgrade. |
| Cables connected. I marked the inverter cables
with yellow tape for "battery end" as the cables might establish a
"set". |
| Much
like the underside of the jack nut flange being dabbed with epoxy
adhesive, the plastic grommets also have the epoxy treatment (proper
cleaning / roughing of surfaces) to keep them in place. |
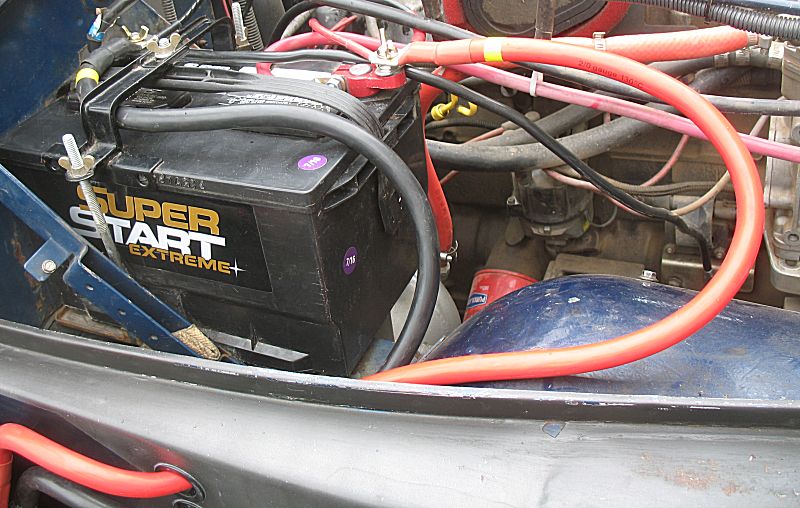
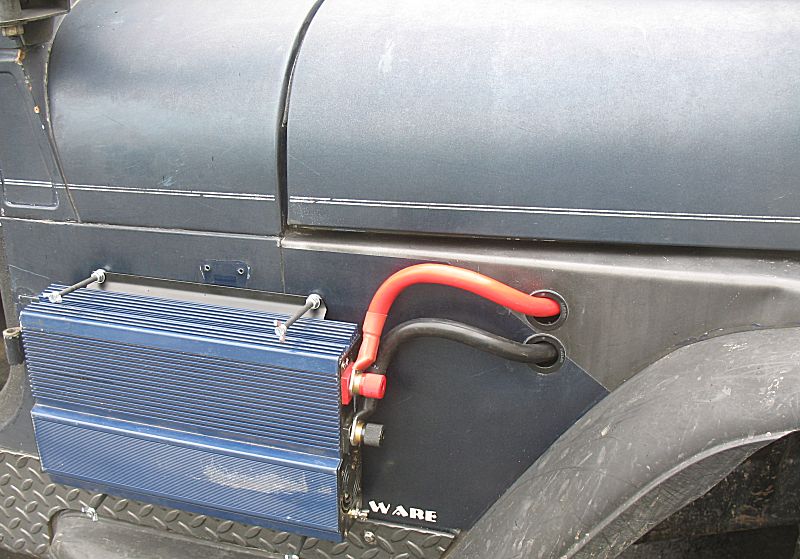
| Hood closed and functional |
| Extension cord always hangs at the ready via
the mirror. |
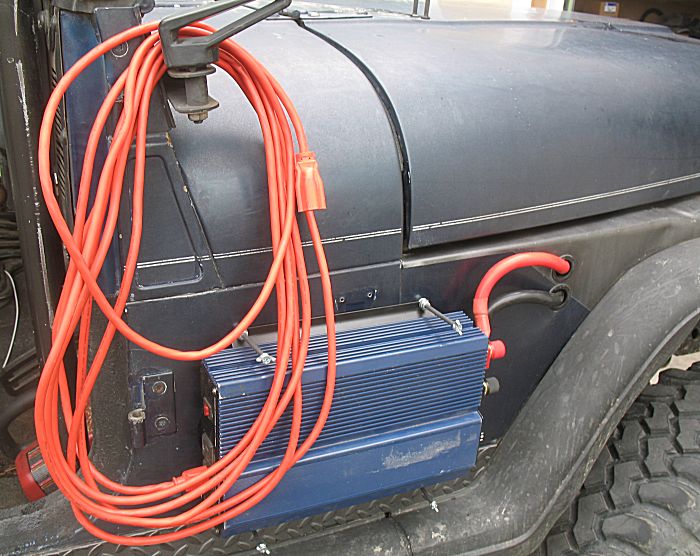
| Pull
up to a spot. Unwrap extension cord, plug in - get the job done. No
need to open/close the hood and connect/disconnect jumper cables.
Cleaner - faster. |
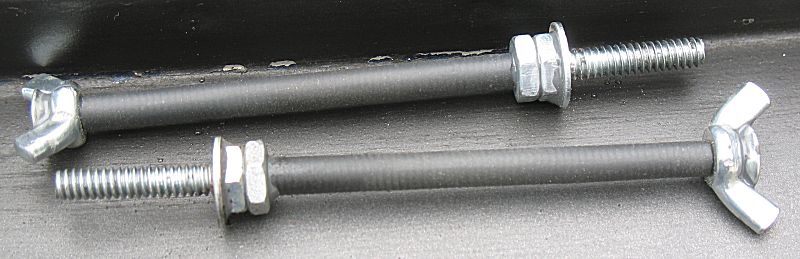
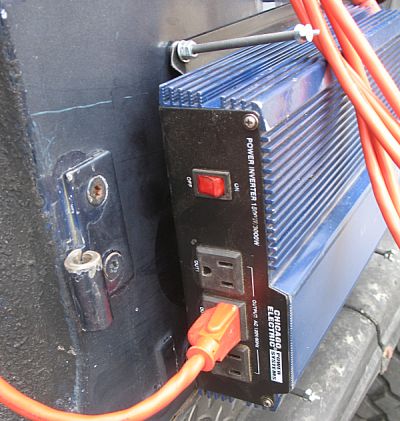
| I
made these thumbscrews. 10-24 screws, 4" long. Wing nuts, with some
epoxy on the threads to keep them from backing out / unscrewing on the
screw. Heat shrink tubing for a nicer look and a smoother surface to
hold/spin. Two nuts jammed together below the heat shrink, again with
epoxy on the threads (not needed but it was out and ready for use),
along with a flat washer epoxied to the nuts. I might upgrade the
wing-nut end to a knob - upgrades, upgrades, upgrades - but it's
working well for now. |