Camera
Setup
Helmet & 1987 Yamaha SRV
The camera head is a HelmetCamera.com
camera (480 Line "Extreme" Kit).
I'm quite pleased with this head unit as it auto adjusts rapidly when moving in/out of shadows, produces a good image, comes with a durable enclosure such as it can get wet and I can (when mounted on the helmet) easily wipe the outer face clean of snow (without damaging the camera's lens). The mounts (currently only one is used - on the rear bumper) are RAM Mounts. The 1" ball size parts are used. They did a decent job of staying put. At first I didn't crank it down tight enough and the camera ended up tilting down a bit. Once it was very tight it DID NOT MOVE. I've used their mounts on the motorcyle and ultralight - they are fantastic. The recording device is a Canon Optura 20 MiniDV camcorder. This unit does not have a LANC connector. A LANC connector and the optional HelmetCamera.com controller would make recording (start/stop/pause) much easier. For my use I simply plugged in a tape and hit record. It would have been a bit more convenient to have a handlebar mounted pause option. The camcorder (with a high capacity battery for it) and the battery pack for the helmet cam and some tapes were in a typical camera bag - single big strap - which I simply put over my helmet and kept in front of me (was easy). The weight of the unit on my neck / back was not bad but I'd look for a different arrangement (some sort of backpack style that would go on my chest perhaps). Having it in front of me made it easier to get at the camcorder. For the two days I went through 3 hours 20 minutes of tape (1 hour per tape max). Each day I basically used two tapes worth. I could have used three or four tapes per day. The raw video data was downloaded to a Compaq Pentium III 900MHz system used for media work (creation & display). MS Windows XP Home, single 160GB IDE drive (ATA-66 I believe) partitioned to 8GB (OS and apps) and the remaining for video files in process (the 3.3 hours, raw capture, total 40.1GB). Pinnacle System's Studio 9 was used to edit and compose the video. One effect I desired to use was the "speed" function. The reason being is that video, specifically when it is filmed from a higher pearch (atop the helmet), does not give the sense of speed that it should. I wanted, and Studio has the feature, to increase the speed of several segments - 10% to 30% works well - but the result is a jerky product (gave me a headache watching it). The resulting MPEG file is from a codec that came with Studio 9. I played with external compressors but was not satisfied enough. On to the pictures. The only mount used (aside from on top of my helmet) in the first snowmobile vid was located on the left side of the rear bumper. In testing I had also mounted one on a ski tip (mounted on the loop) but that video was very jumpy [note to all: always have a safety strap for the camera (which for me is the yellow Velcro seen in the pictures below) for when the camera was on the ski tip the "industrial" velcro's adhesive came loose and the camera bounced about near the ski. The camera, in it's protective housing, was fine except that the cord to the camera was being pulled on. Fortunately the cord was not damaged]. I will be looking for several other mounting locations for future vid's (front suspension, rear suspension, driver, track / under belly). For those who have seen the 2004-02-26 snowmobile video you will also notice the "round black tube" portions in the video. This is caused by the camera itself not being mounted fully seated into the protective housings case. What we end up with is the camera seeing the round tube of the housing. Not a bad effect IMO. Simply making sure the camera is pushed fully seated would have given a full picture.
"Industrial" velcro type
connection to the helmet 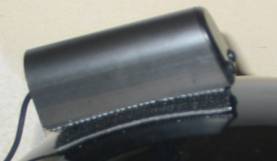 Camera facing forward Position is for level recording when the helmet is in a natural in-use position 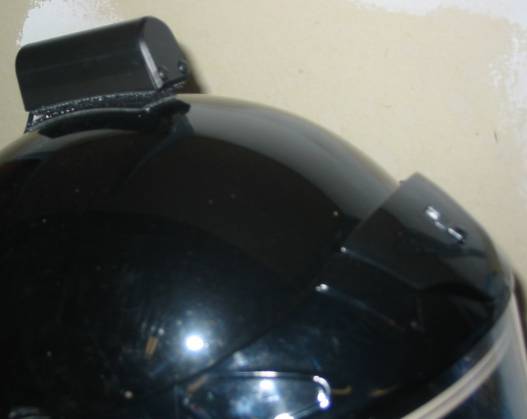 Camera facing rearwards On this view you can also see a set screw on the left side of the protective housing. This screw holds the camera in the housing. With the screw loosened you can position the camera in any 360 deg rotation in the housing (needed for other mounting positions) as well as to use the camera without the housing. 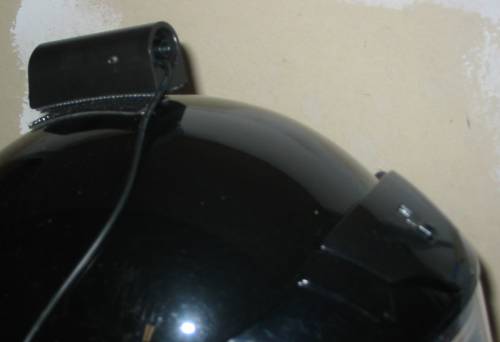 RAM mount on the SRV's rear bumper 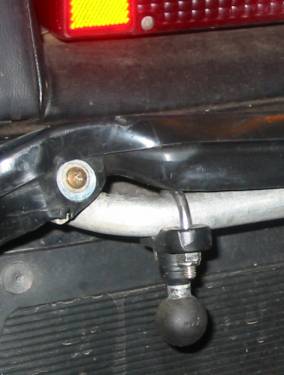 Corresponding RAM mount components  Camera mounted - facing rearward 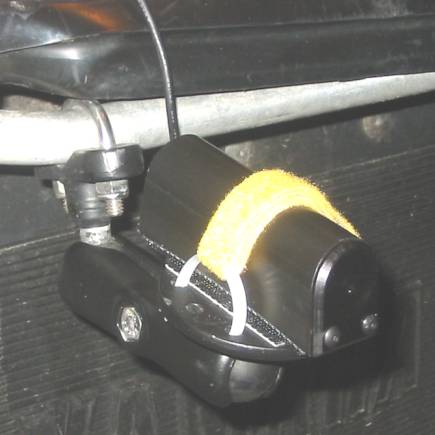 Camera mounted - facing sideways 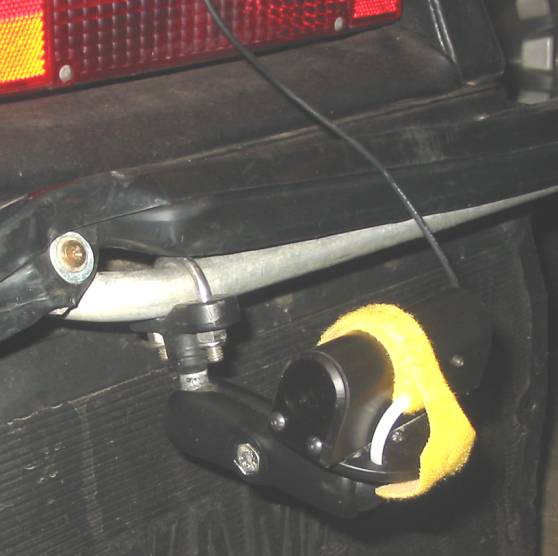 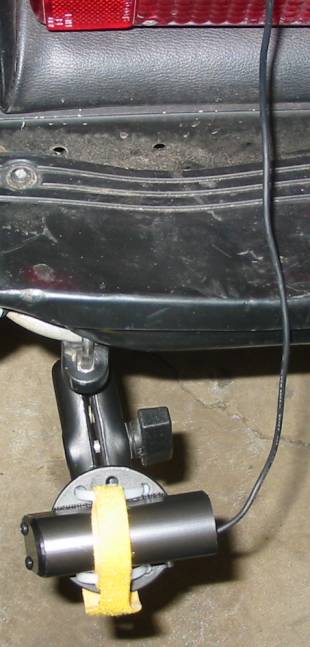 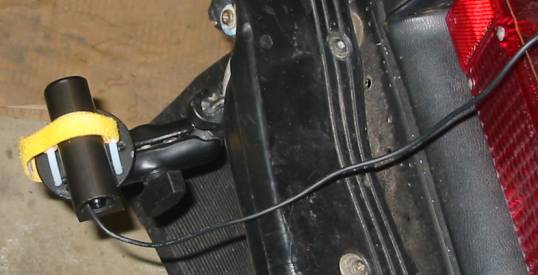 |