Sears Kenmore Tumble Action Washer / Front Load Washer
Model 417.40052990
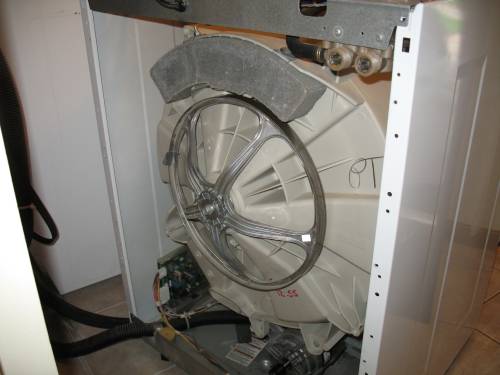
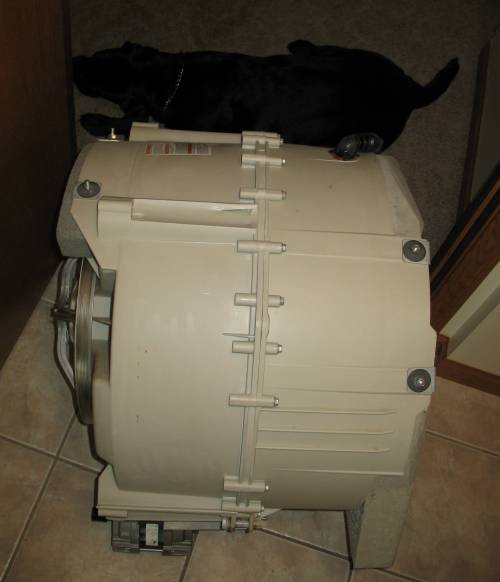
| Edit: 03/2009: A note from Laura that's worth putting at the top of the page: "I just wanted to thank you for the information you provided on taking apart your Kenmore washer. It was very helpful. I also wanted to let you know what I found out about parts for these types of washers. GE/Kenmore parts are about 2 - 3 times as much as the Fridgedaire parts and are interchangable. I had a bearing that went out on my GE Profile washer. I was told the part would be $330 plus the labor. Well, the fridgedaire part cost $190 with shipping from Sears and took my husband about 3 hrs to replace it." The unit started to emit a LOUD banging noise when it was in the spin mode ("fast" spin is typically selected instead of "normal" spin). It was loud enough that I didn't want to stand near the unit as my ears hurt a bit. I pulled out the digi-cam and put it into movie mode. It captured the sound of the clank/bang but at nowhere near the volume level. Step two was to disassemble the unit to find the cause. I didn't plan on photographing the procedure so the first several steps were not pictorally documented - but easily are via words. Disconnect power, shut off water, pull the unit from the wall and disconnect supply water, remove rear panel. The below picture shows the back panel removed - remove the screws holding the panel to the housing. Exposed is the tub assembly with large driven pulley, belt, motor. In the bottom left is the motor control board and the water pump outlet hose. The belt is already removed in this photo. |
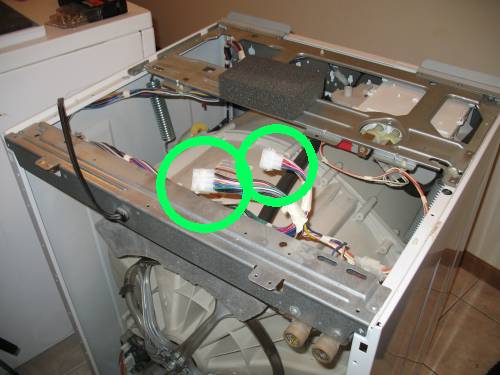
| To remove the top you first need to remove the backing plate from the control knob panel. In there you will find two connectors (green circles) - disconnect them. Remove the four screws from the tabs extending outward from the unit. The top cover will then slide forward a bit and then can be removed. Access from the top makes it easy to remove the high water hose and allow easier access to the suspension springs. |
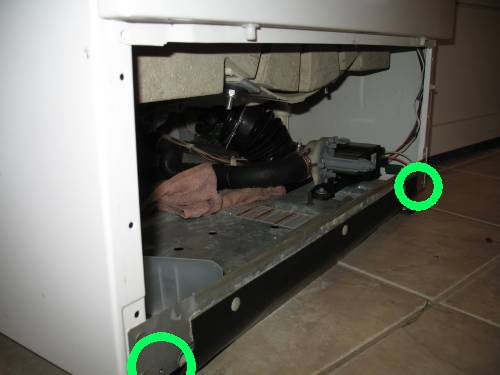
| To remove the front cover, remove the two
screws, one at each corner (green circles). Removing the front cover
allows you to remove the water pump and piping. Why? Well, the big tub
has cement? weights on it thus making the removal of the tub heavy -
you'll want to set the tub down before removing it from the housing -
you won't want to crush the water pump or piping. Removing the water
pump is easy enough. Tip: If you plan on removing the tub go ahead and remove the drive motor while the the tub is in the housing. It is easy to get at, is somewhat heavy itself (thus will lessen the big heavy lift of the weighted tub), and you won't be setting the heavy tub assembly down on the motor and possibly the wiring coming out from it. |
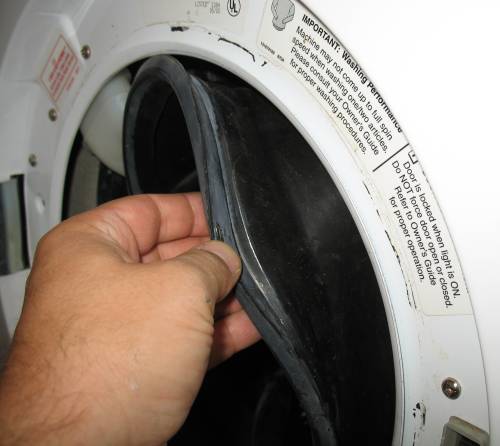
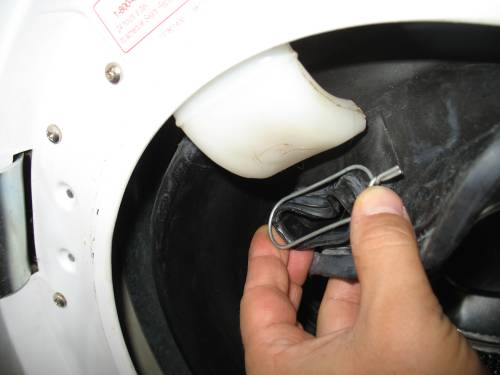
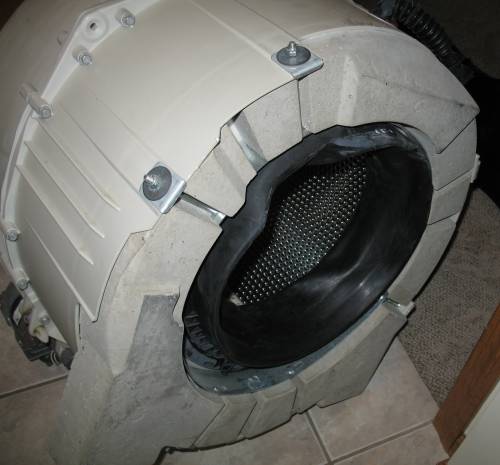
| The rubber gasket around the door is removed from the housing. There may be five or six spots where adhesive was used to hold it into place (not entirely sure adhesive is needed upon reassembly). Gently pull / remove the gasket from the white housing. The inner lip of the gasket will stay in place. |
| The incoming water / cleaner solution pipe has a wire clip holding the gasket in place. Un-wrap the wire holder and slide the rubber gasket off of the inlet spout. |
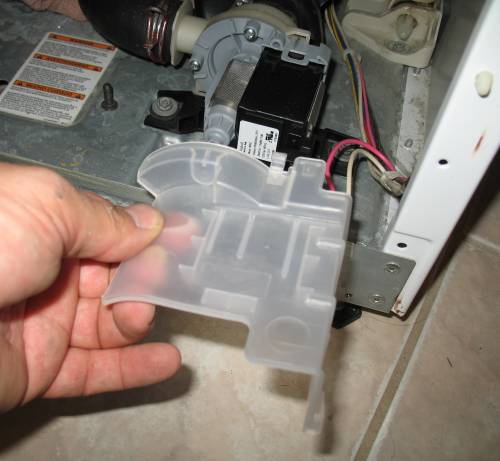
| Now for the water pump... Unclip the water shield from the top of the pump assembly. Set it aside. |
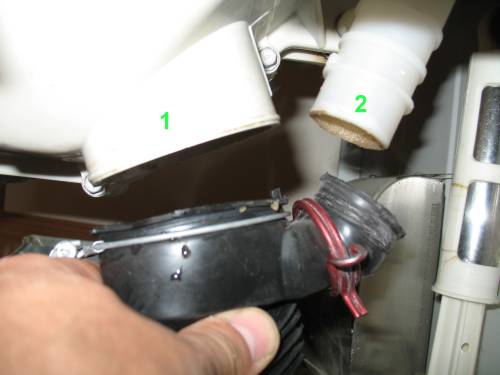
| Loosen the main tub drain (1) retainer and remove the large black drain boot. Loosen and remove the retainer on the high water switch system (2) and remove that black rubber. |
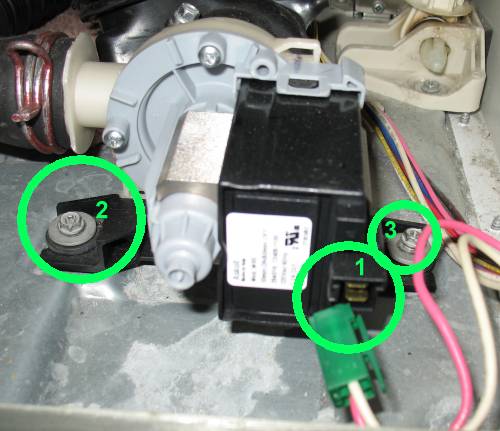
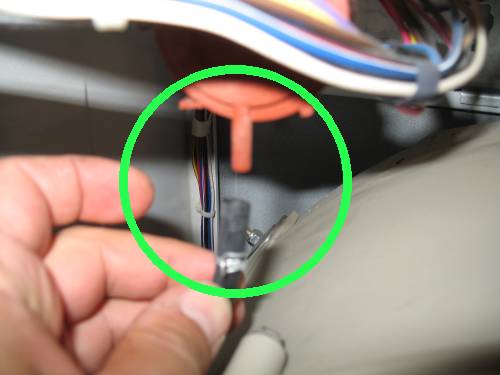
| Disconnect the power feed (1) from the water pump. Loosen / remove the two water pump screws (2 and 3). Remove the water pump and drain hose assembly - pull the water pump out from the back of the washer. Set aside. |
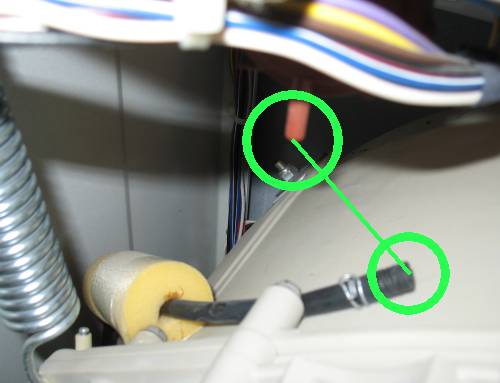
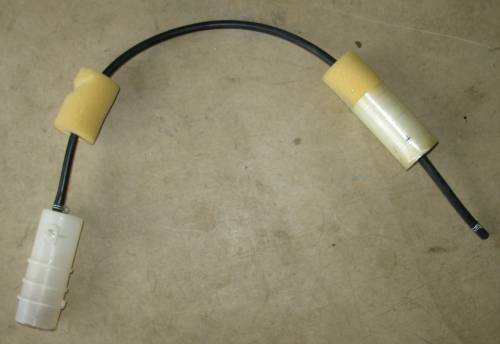
| Disconnect the high water level shut off tube from the switch (green circle). This is on the top of the tub at the top of the unit. |
| I pinched the hose under a screw head of the tub to hold the hose into place while it is disconnected. |
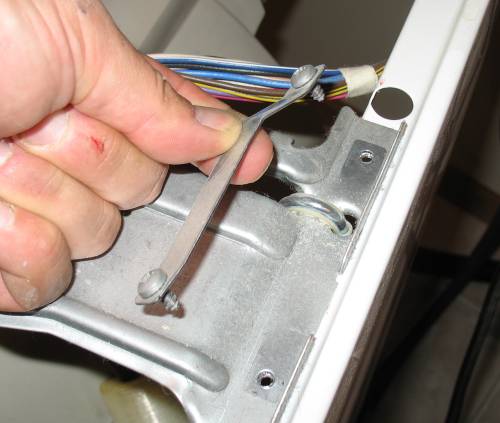
| Remove the two retaining bars (right side shown) for the suspension springs. Set the bars aside. |
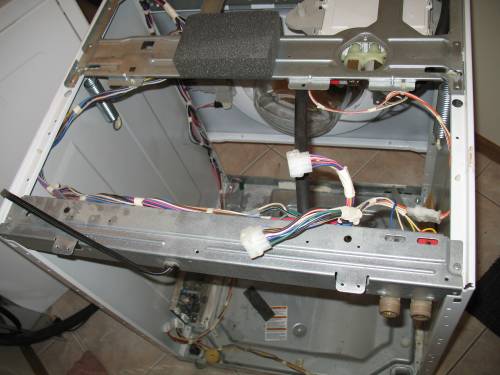
| There's a bit of a jump between the above
photo and this photo. The two main items are the disconnection of the
lower shock absorbers and the removal of the tub assembly. To disconnect the two bottom shock absorbers remove the pin that connects each shock to the tub. There is a retaining tab that needs to be pushed in as it is removed. I used some pliers to pull the pin out as I held the retaining tab so that it could be pulled out. With the top pins out the shocks can be pivoted out of the way. Removing the tub is helpful with one person at the front, one person at the rear, and one (or two) to work the two support springs. I found it easier to remove the springs from the top hook and then when the tub is removed replace the springs in the housing (so they don't get lost). |
| Tub assembly just removed. |
| Front face |
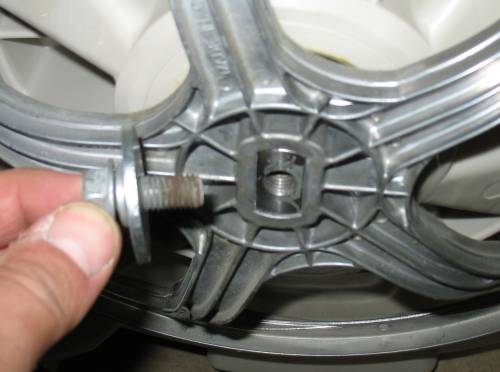
| Conventional / right hand threaded bolt to retain the driven pully. |
| Weights removed. |
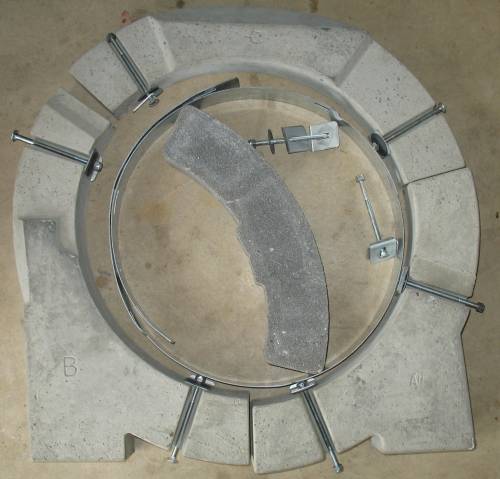
| High water sensor piping removed. |
| Bolts to keep the two tub assembly halves together. |
| Pull off the front face of the tub assembly |

| Tub and tub back half still connected. |

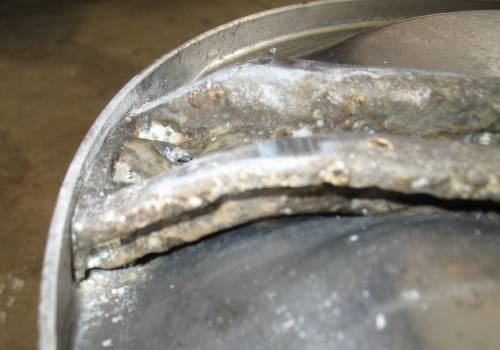
| I notice some scapes (right side) and marring (left side) from the stainless steel tub |
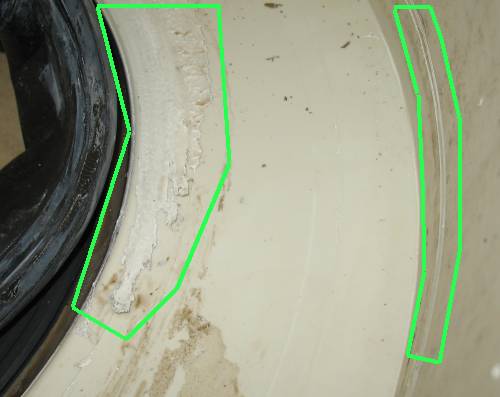
| Stainless steel tub removed from the back half - more scrapes. |

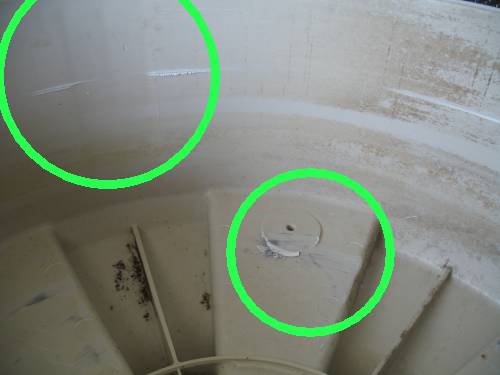
| And the reason for the out of balance issues, banging, scraping, loud noises - broken support. |
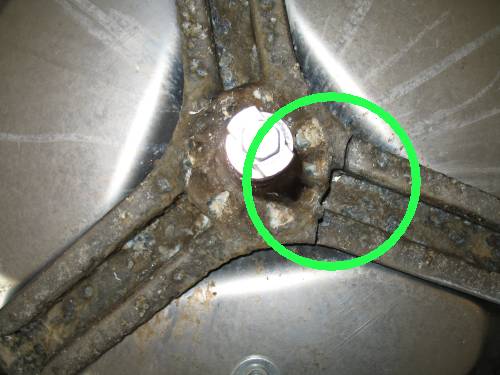
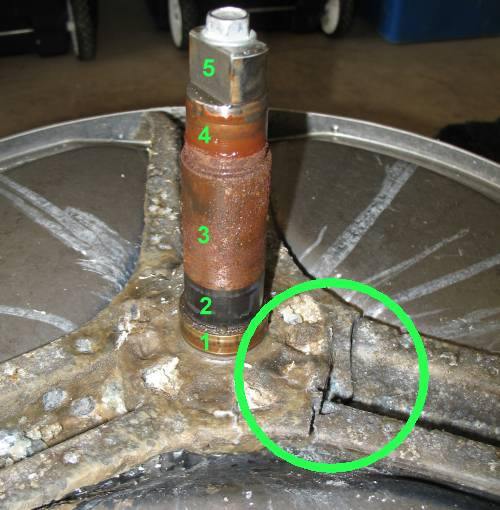
| With the stainless steel tub removed from the back half we can see the "drive shaft". 1) Surface the water seal rides on, 2) inner bearing location, 3) rust - water has leaked past the water seal, 4) outer bearing location, 5) driven pulley location. Circled item is the broken leg. With each roation of the drum, on the fast spin, it would emit a LOUD clang. |
| Outer bearing. |

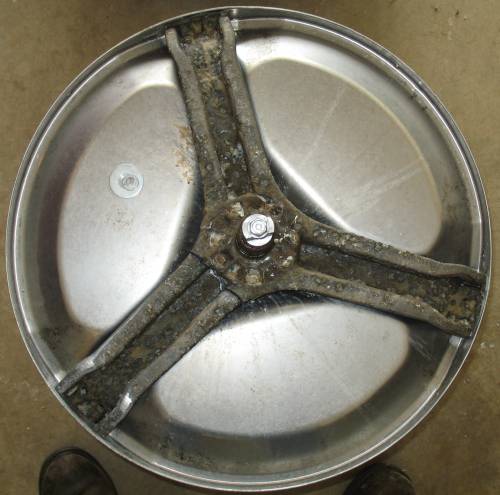
| The three leg assembly is able to be un-bolted from the tub. |
|
End result
A Sears 1-year maint contract was purchased. Always a
gamble. In the end the only parts that were replaced were the basket (yes,
you buy the tub as the spider assembly is not sold seperately) and the
"back half" of the tub (which includes the gasket). Should it
happen again I'd buy these parts directly and replace them myself.The Sears maint tech said the cause was the use of standard detergent (not using High Efficiency detergent). The standard detergent creates too many suds, gets high enough to get to the seal (driveshaft) allowing water to get to the bearings. The "inner" bearing fails allowing the basket to hit the tub which causes the spider to break. The owners manual that came with the unit does not specify the use of HE detergent. |